Knative is a platform for running Serverless workloads on Kubernetes clusters. It provides middleware abstractions and APIs that ease the development and deployment lifecycle in order to allow developers to focus on application logic. For example, Knative deals with the networking and exposing of applications, tracking of versions and scaling (including to zero). Further, it offers declarative ways to bind applications to events and data streams including those based on Apache Kafka.
Apache Kafka can be used in Knative applications in two ways: firstly, Kafka can be used as the underlying transport for internal Channels; and secondly, it can be used as the source of events.
This blog post will focus on the latter and demonstrate how to develop a scalable application that responds to messages on a Kafka Topic.
The Knative project includes two components, Knative Serving and Knative Eventing.
Knative Serving deals with the deployment, routing and scaling of the serverless containers.
Knative Eventing is responsible for the messaging infrastructure to connect these containers to sources of events.
Installation
Our application will run in Minikube although Knative and Strimzi can both work in any Kubernetes cluster - there is no vendor lock in. Initially we need a working Minikube cluster with the relevant components installed. The community documentation describes how to install Knative on Minikube. Notice that Knative requires a lot of resources - at least 10GB of memory and 6 CPUs are recommended. The installation of Knative is complicated and involves a number of steps. For instance, first a ServiceMesh such as Istio, Ambassador or Gloo must be installed, then Knative Serving and finally Knative Eventing.
Fortunately, one of the contributors to Knative Eventing has developed a much simpler install script for Minikube.
This script will install not just Knative but all the dependencies and even Strimzi itself.
Knative version 0.9.0 will be used along with the latest release of Strimzi (currently 0.13.0).
Checkout the repository.
It may be necessary to update some of the configuration in the setup.sh such as the vm-driver if you do not have an existing Minikube configuration.
You should be able to use kvm2 on Linux and hyperkit on MacOS.
Run the setup.sh script which will take some time to install the necessary components.
Note: It should go without saying that any deployment on Minikube is not suitable for production.
This is even more the case here where the Strimzi installation uses a single node for the broker and ZooKeeper.
Knative Eventing comes with EventSources that can emit messages from Kubernetes platform events, GitHub events and based on time. The Kafka EventSource is not part of the core installation but the installation script adds that too.
Deploying an application
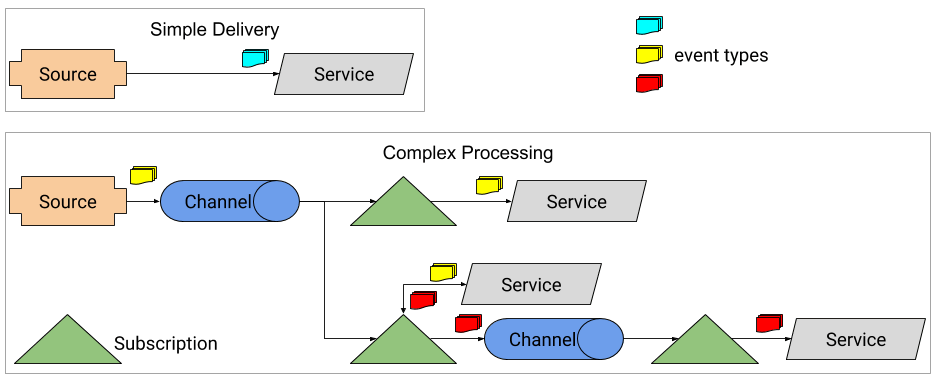
Knative provides a number of different ways to consume events from Apache Kafka. The simplest, which will be shown here, is to connect a Kafka EventSource directly to a Knative Serving application. Others include decoupling the Source and Service using a Channel (more applicable when the source is not a messaging platform itself) and routing via an internal Broker.
We will use a pre-built Knative Serving application that will log events to the console.
The yaml for the service is shown below with the key points being the name and namespace.
apiVersion: serving.knative.dev/v1alpha1
kind: Service
metadata:
  name: logevents
  namespace: default
spec:
  template:
    spec:
      containers:
      - image: docker.io/matzew/event-display
Save this yaml to a file and deploy it with the usual kubectl apply -f service.yaml.
This will create a Custom Resource for the serving function and an initial pod to service the requests.
You can view the state of the serving function using the ksvc CRD.
$ kubectl get ksvc
NAME        URL                                    LATESTCREATED     LATESTREADY       READY     REASON
logevents   http://logevents.default.example.com   logevents-c5jlv   logevents-c5jlv   True
The Serving application automatically exposes an HTTP endpoint to invoke the service from inside and outside the Kubernetes cluster.
However, we want the service to respond to messages on a Kafka Topic.
Therefore we create a KafkaSource Custom Resource which controls the Topic to application mapping.
The KafkaSource includes properties for the address of the Kafka Broker, the topic to consume from and the consumer group that the consumer should belong to.
It is also possible to configure the source to use TLS encryption and SASL authentication if required by the Kafka broker - the Source is able to extract the relevant usernames, passwords and certificates from Kubernetes Secrets.
Finally, in the spec.sink section the Source references the Serving application that was created earlier.
If the Kafka Topic does not already exist in Strimzi the KafkaSource will create it.
In this case the Topic is created with a single partition and consumer for that partition.
For most applications this is not optimal and also limits the scalability of the EventSource.
Internally the EventSource will create one concurrent consumer per partition and so increasing the number of partitions in the Topic improves throughput.
To solve this, you can create a standard Strimzi KafkaTopic resource with the desired specification before creating the KafkaSource.
apiVersion: sources.eventing.knative.dev/v1alpha1
kind: KafkaSource
metadata:
  name: kafka-source
  namespace: default
spec:
  consumerGroup: knative-group
  bootstrapServers: my-cluster-kafka-bootstrap.kafka.svc:9092
  topics: my-topic
  sink:
    apiVersion: serving.knative.dev/v1alpha1
    kind: Service
    name: logevents
Save and deploy this yaml file using kubectl apply -f source.yaml to create the source.
With everything deployed and connected, all that is left is to produce some messages to the my-topic Topic.
In this example, Strimzi is not exposed outside the cluster so the simplest way is to run the console-producer in a pod inside Minikube.
kubectl -n kafka run kafka-producer -ti --image=strimzi/kafka:0.13.0-kafka-2.3.0 --rm=true --restart=Never -- bin/kafka-console-producer.sh --broker-list my-cluster-kafka-bootstrap:9092 --property "parse.key=true" --property "key.separator=: --topic my-topic"
> my-key:{"text":"Strimzi + Knative FTW!"}
This message will be sent to my-topic and then consumed by the logevents Serving application.
View the logs of the log-events-XXX pod in the default namespace.
This will show the message formatted as a CloudEvent.
All messages in Knative Eventing are represented as CloudEvents and the payload of the CloudEvent contains the value of the Kafka message.
The key of the message is included in the CloudEvent headers.
Note that if you send a non-JSON payload it will be base-64 encoded in the body.
$ kubectl logs -n default logevents-c5jlv-deployment-558b8c7564-5r6w4 -c user-container

CloudEvent: valid
Context Attributes,
  SpecVersion: 0.2
  Type: dev.knative.kafka.event
  Source: /apis/v1/namespaces/default/kafkasources/kafka-source#my-topic
  ID: partition:0/offset:11
  Time: 2019-09-23T11:06:01.987Z
  ContentType: application/json
  Extensions:
    key:  my-key
Transport Context,
  URI: /
  Host: logevents.default.svc.cluster.local
  Method: POST
Data,
  {
    "text": "Strimzi + Knative FTW!"
  }
One of the features of Knative Serving is that the application is scaled to zero when not in use. Therefore after sending the message you will have to look at the logs quickly or the pod will disappear. In contrast, if you send a lot of messages you will see Knative automatically adding additional pods to deal with the load.
Conclusion
This post has shown how to deploy Strimzi with Knative in Minikube and deploy a simple Knative Serving application. Knative Eventing was used to connect this application to a Kafka Topic in order to consume messages. A follow up will demonstrate how to develop more complex scenarios and write your own Knative Serving applications.
Share this:
![]()
![]()
![]()
![]()
![]()